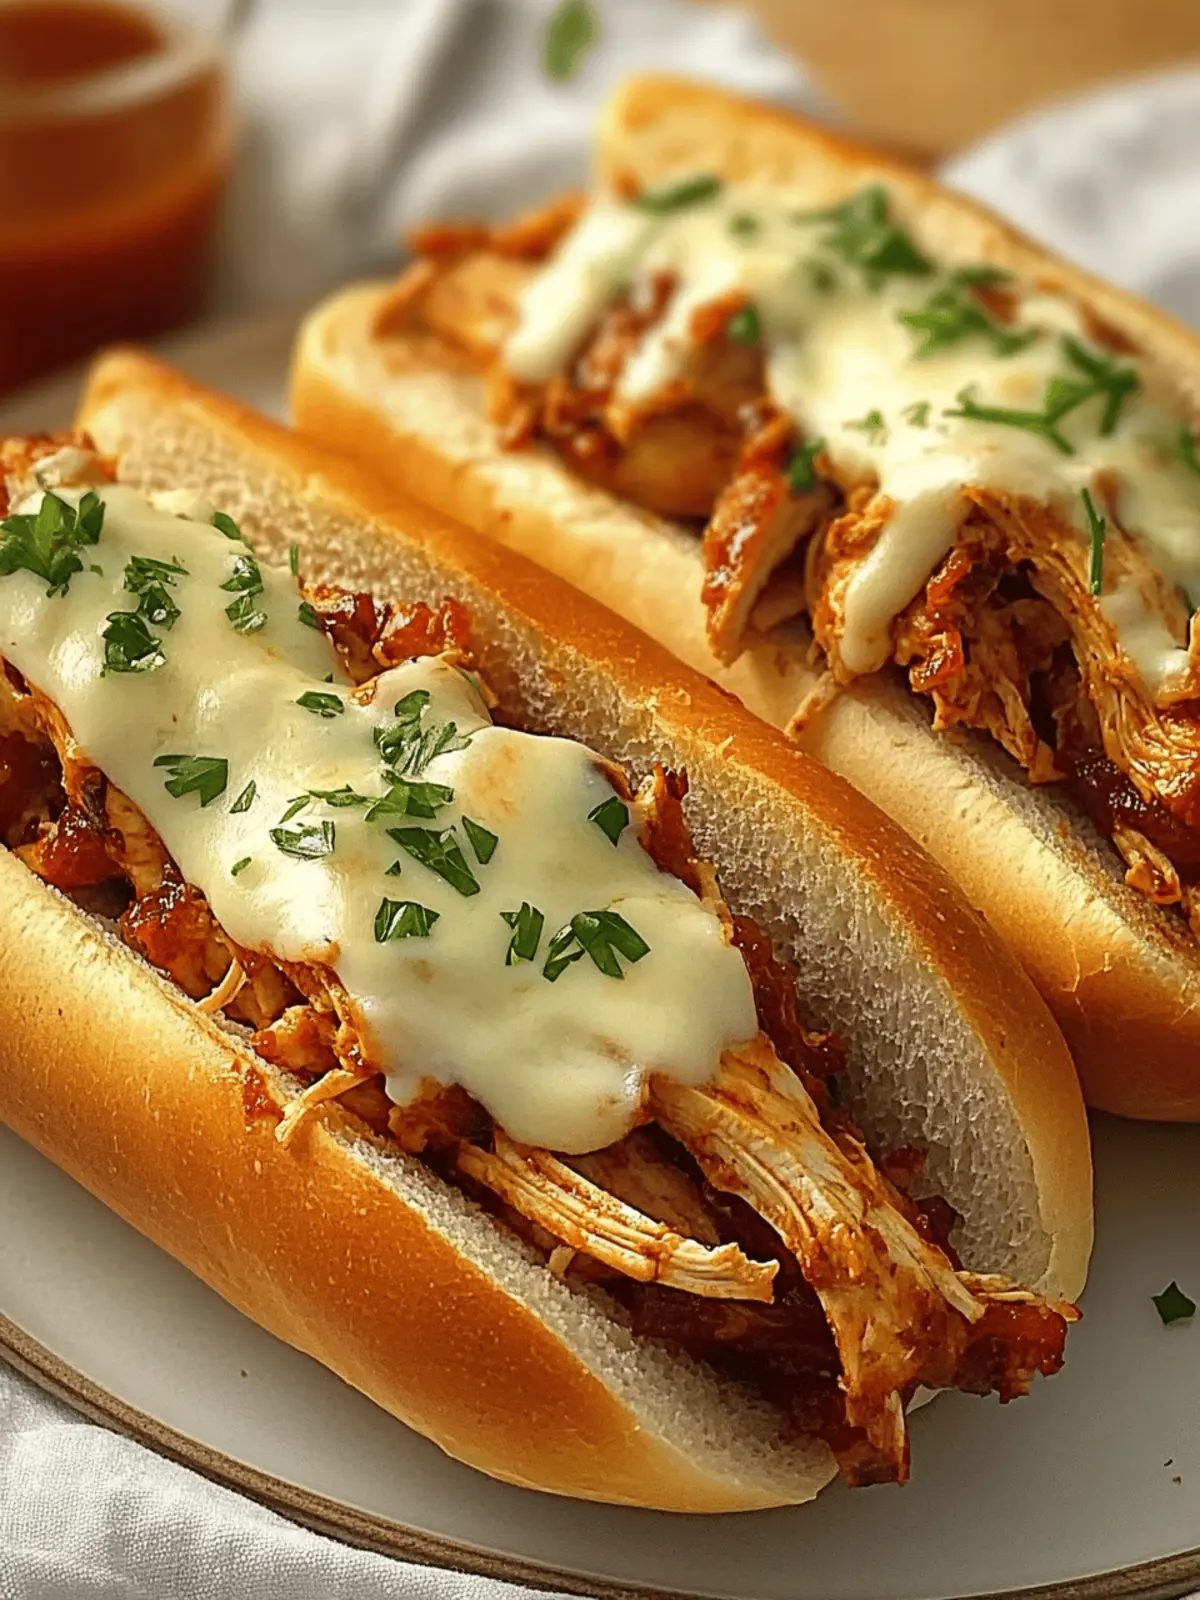
There’s nothing quite like the comforting aroma of seasoned chicken sizzling in the skillet, especially when that chicken is destined for a deliciously stacked Loaded Chicken Sub. Imagine juicy strips of chicken, perfectly complemented by sweet caramelized onions and vibrant bell peppers, all lovingly cradled in a soft, toasty roll. This recipe is not just a meal; it’s an experience that brings people together around the dinner table or adds excitement to game-day gatherings.
I discovered this dish during a week when I was tired of the same old fast food routine and craving something hearty yet customizable. This Loaded Chicken Subs recipe allowed me to get creative, swapping ingredients based on what I had on hand, and the results were nothing short of spectacular. Whether you’re entertaining friends or simply want to treat yourself, these subs are a crowd-pleaser that you can whip up easily, making them a go-to in my kitchen. Plus, they cater to various dietary needs with gluten-free options available. Let’s dive into this satisfying recipe and discover just how easy it is to bring comfort food back into your life!
Why Love the Loaded Chicken Subs Recipe?
Comforting Appeal: There’s something undeniably cozy about sinking your teeth into a hearty Loaded Chicken Sub, especially after a long day.
Customizable Goodness: This recipe lets you mix and match ingredients based on your cravings or fridge contents, making it perfect for any night of the week.
Quick & Easy: With just a few steps, you can create a delicious meal that doesn’t require hours in the kitchen.
Crowd-Pleaser: Whether it’s a family dinner or a game-day feast, these subs are sure to impress everyone at the table.
Gluten-Free Options: You’ll love the flexibility, as gluten-free rolls are available, ensuring everyone can enjoy this tasty treat.
Ready to make your own? Check out how to prepare these tasty sandwiches for the perfect meal!
Loaded Chicken Subs Recipe Ingredients
For the Chicken
- Chicken Breast – Main protein; provides heartiness. Substitute with chicken thighs for juicier results.
- Olive Oil – Cooking fat; adds richness. Optional to use avocado oil for a different flavor.
- Garlic Powder – Flavor enhancer; imparts depth. Fresh garlic or garlic salt can be used as alternatives.
- Smoked Paprika – Provides a hint of smokiness and warmth. Substitute with regular paprika for less heat.
- Salt & Pepper – Essential seasonings; balance flavor. Adjust quantity based on personal taste.
For the Veggies
- Onions – Adds sweetness and crunch when caramelized. Shallots can be used for a milder flavor.
- Bell Peppers – Offers color and a slight sweetness; can use any color. Substitute with jalapeños for heat.
For Assembly
- Sub Rolls – Base for the sandwich; provides texture. Gluten-free rolls ensure everyone can enjoy the Loaded Chicken Subs recipe.
- Shredded Cheese – Melty topping; enhances flavor. Pepper jack or sharp cheddar can be used for variation.
- Mayonnaise (optional) – Creaminess on the roll; adds richness. Can be replaced with avocado for healthier options.
For Toppings
- Lettuce, Tomatoes, Pickles – Freshness and crunch; adds visual appeal. Customize with favorite salad greens for extra freshness.
How to Make Loaded Chicken Subs
- Heat Oil: Start by heating olive oil in a skillet over medium heat. This is where the magic begins, so be sure it’s hot before adding the chicken!
- Cook Chicken: Add the seasoned chicken strips to the pan and cook for about 6-8 minutes, flipping until golden brown and juicy. Your kitchen will be filled with delicious aromas!
- Sauté Veggies: Remove the chicken and use the same skillet to sauté onions and bell peppers. Cook them for about 5-7 minutes until they’re beautifully caramelized, bringing out their natural sweetness.
- Toast Sub Rolls: While veggies are cooking, toast your sub rolls. You can do this under a broiler or in a skillet. Aim for a golden brown color for the perfect crunch.
- Assemble Subs: Optionally spread mayonnaise on the toasted rolls for extra creaminess. Layer the chicken, sautéed veggies, and shredded cheese on top.
- Melt Cheese: Place the assembled subs under the broiler for just 1-2 minutes until the cheese is bubbly and hot—this is where it all comes together!
- Add Fresh Toppings: Finish off by adding any fresh toppings you like, such as lettuce, tomatoes, or pickles, to add a refreshing crunch.
Optional: Serve with kettle chips or a side salad for a complete meal.
Exact quantities are listed in the recipe card below.
Loaded Chicken Subs Variations
Feel free to get creative and make these Loaded Chicken Subs your own masterpiece!
- Spicy Twist: Add jalapeños or a splash of hot sauce to the chicken as it cooks for an extra kick. Your taste buds will thank you for the heat!
- Veggie Delight: Substitute chicken with roasted chickpeas or grilled zucchini for a vegetarian option. This twist keeps it hearty while capturing a delightful array of flavors.
- Cheese Swap: Use feta or goat cheese for a tangy touch that contrasts beautifully with sweet peppers and onions. The creamy texture adds an elegant flair!
- Herb-Infused: Sprinkle fresh herbs like basil or cilantro either inside the subs or as a topping for a refreshing burst of flavor. Freshness elevates the whole dish!
- BBQ Flavor: Swap out paprika for barbecue seasoning and drizzle some barbecue sauce on the finished subs for a smoky, tangy twist that will remind you of summer cookouts.
- Creamy Avocado: Replace mayonnaise with mashed avocado for a lighter, creamier option. It not only enhances flavor but also adds a rich creaminess that pairs well with the toppings.
- Different Bread: Try using whole wheat or sourdough bread instead of classic sub rolls for added texture and a hint of nuttiness. The bread can change the whole eating experience!
- Crunch Factor: Top with crispy fried onions or potato chips for an irresistible crunch. This simple addition takes your subs from delicious to downright addictive!
What to Serve with Loaded Chicken Subs?
Bring your family and friends together for a delightful meal experience with flavors that meld beautifully.
- Kettle Chips: The crunchiness of kettle chips pairs wonderfully with the soft, melty sub, adding a satisfying texture contrast.
- Crunchy Coleslaw: A tangy coleslaw offers refreshing crispness and balances the richness of the subs, making each bite just right.
- Simple Green Salad: A vibrant salad featuring mixed greens and cherry tomatoes can lighten the meal and add freshness to each mouthful.
- Sweet Potato Fries: Whip up some sweet potato fries for their natural sweetness, creating a delicious complementary contrast to the savory chicken.
- Creamy Potato Salad: A classic potato salad can enhance the comfort food experience, providing creaminess that pairs well with the succulent subs.
- Sparkling Lemonade: Refreshing and zesty, sparkling lemonade will cleanse your palate and add a fun, fizzy touch to the meal.
- Chocolate Chip Cookies: For dessert, classic chocolate chip cookies are a perfect sweet finish, complementing the hearty flavors of the Loaded Chicken Subs.
Make Ahead Options
These Loaded Chicken Subs are perfect for meal prep enthusiasts! You can marinate and cook the chicken breast up to 24 hours in advance, refrigerating it in an airtight container to keep it juicy. The caramelized onions and bell peppers can also be sautéed beforehand and stored alongside the chicken for up to 3 days. When you’re ready to serve, simply reheat the chicken and veggies in a skillet until warmed through, toast your sub rolls to perfection, and layer the fillings. This way, you’ll have delicious, restaurant-quality subs on the table in no time, making busy weeknights much easier!
Expert Tips for the Loaded Chicken Subs Recipe
- Choose Quality Chicken: Use fresh, high-quality chicken breast or thighs for the juiciest, most flavorful result. Substitutes might not yield the same tenderness.
- Perfectly Caramelized Veggies: Sauté onions and bell peppers until they are golden brown to enhance their sweetness. Don’t rush this step; patience pays off.
- Watch Your Rolls: Keep a close eye on the sub rolls while toasting; they can burn quickly under the broiler. Aim for just the right golden crisp!
- Customize Wisely: Feel free to swap out ingredients based on your dietary needs, but remember to maintain good balance in flavors and textures for the best Loaded Chicken Subs.
- Fresh Toppings Matter: Adding fresh lettuce, tomatoes, or pickles enhances flavor and provides a delightful crunch that takes your subs to the next level!
Storage Tips for Loaded Chicken Subs
- Fridge: Store leftover Loaded Chicken Subs in airtight containers for up to 3 days. Keep the bread and fillings separate to maintain their textures and flavors.
- Freezer: For longer storage, wrap the subs individually in foil or plastic wrap and freeze for up to 2 months. Reheat in the oven for best results to restore the crispiness.
- Reheating: When ready to enjoy, thaw overnight in the fridge if frozen, then reheat in a preheated oven at 350°F (175°C) for about 10-15 minutes, until warm and the cheese is melty again.
- Extra Tips: For optimal taste, avoid microwaving the subs, as this can make the bread soggy. Instead, use the oven to keep that delicious crunch!
Loaded Chicken Subs Recipe FAQs
What type of chicken should I use for the Loaded Chicken Subs?
Absolutely! While chicken breast is a popular choice for its lean texture, using chicken thighs can result in a juicier, more flavorful sub. Thighs tend to stay tender during cooking, so they’re a great option if you prefer a richer taste. Just ensure they’re cooked through, and you’ll have wonderful results!
How should I store leftovers from the Loaded Chicken Subs?
After enjoying your delicious Loaded Chicken Subs, store any leftovers in airtight containers in the fridge for up to 3 days. I recommend keeping the bread and fillings separate to maintain their textures and flavors. This way, the next time you’re ready to indulge, your sub will still be fresh and tasty!
Can I freeze the Loaded Chicken Subs?
Very! To freeze, wrap your Loaded Chicken Subs separately in foil or plastic wrap, ensuring they’re tightly sealed. They can last in the freezer for up to 2 months. When you’re ready to enjoy them again, thaw them overnight in the fridge, then reheat them in a preheated oven at 350°F (175°C) for about 10-15 minutes. Baking restores the crunchiness of the bread perfectly!
What should I do if my chicken is dry after cooking?
Don’t worry, it happens to the best of us! If your chicken turns out dry, you can salvage it by slicing it and tossing it in a little chicken broth or olive oil before assembling your subs. This little trick adds moisture and flavor back to the chicken, helping it blend beautifully with the melty cheese and veggies.
Are there gluten-free options for the Loaded Chicken Subs recipe?
Yes! You can easily cater to gluten-sensitive individuals by using gluten-free sub rolls, which are widely available in grocery stores. Just check the labels to ensure they’re suitable for your guests. This way, everyone can enjoy the comfort and deliciousness of your Loaded Chicken Subs!
Can I customize the vegetables in this recipe?
Absolutely! The beauty of the Loaded Chicken Subs is their versatility. You can experiment with other vegetables like mushrooms, zucchini, or even add some spicy jalapeños if you love a kick. The more the merrier when it comes to flavor and texture, so feel free to make this recipe your own!

Loaded Chicken Subs Recipe with Melty Cheese and Veggies
Ingredients
Equipment
Method
- Heat olive oil in a skillet over medium heat.
- Add seasoned chicken strips and cook for about 6-8 minutes until golden brown.
- Remove the chicken and sauté onions and bell peppers in the same skillet for about 5-7 minutes.
- Toast sub rolls under a broiler or in a skillet until golden brown.
- Spread mayonnaise on toasted rolls, then layer with chicken, sautéed veggies, and shredded cheese.
- Place the assembled subs under the broiler for 1-2 minutes until the cheese is bubbly.
- Add fresh toppings like lettuce, tomatoes, or pickles before serving.

